
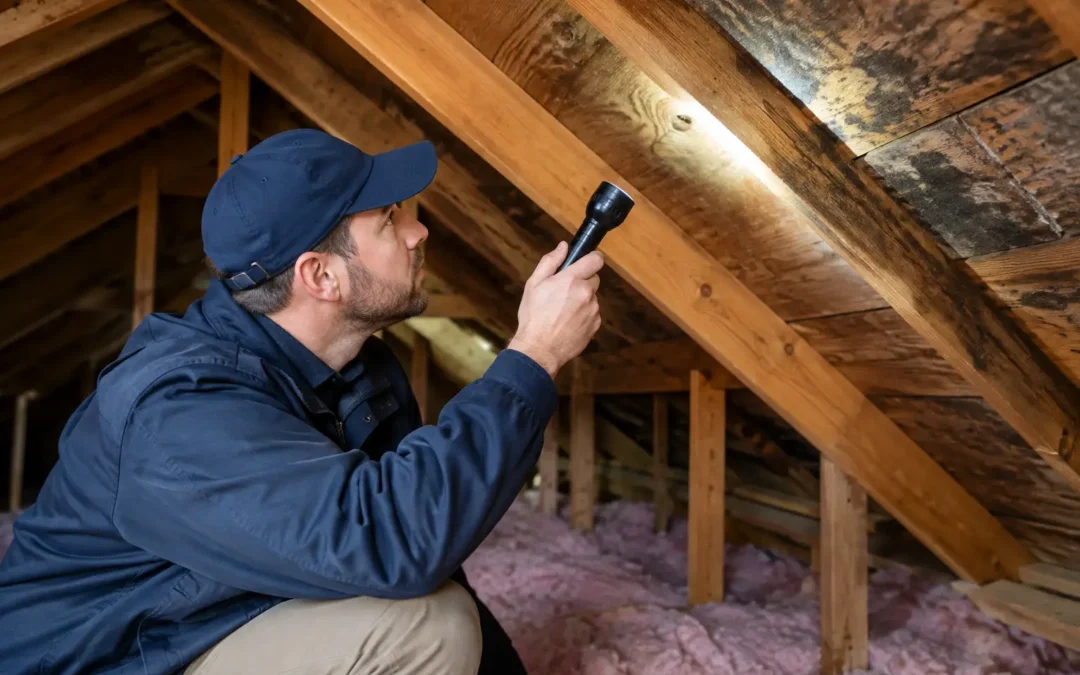
A roof leak does not always announce itself with a ceiling drip. In many Hudson Valley homes, the first warning is hidden above the insulation. Knowing how to inspect attic for roof moisture can help you catch a small issue before it damages framing, ruins insulation, or creates mold conditions inside your home.
The goal is not to turn every homeowner into a roofer. It is to recognize what looks normal, what needs attention soon, and what calls for immediate professional help. After heavy rain, wind-driven storms, snowmelt, or a long cold stretch, a careful attic check can protect one of your property’s most important systems.
When to Check Your Attic
An attic inspection is worthwhile at least twice a year, usually in spring and fall. It also makes sense after a major storm, a suspected leak, an ice dam, or any time you notice a new ceiling stain, peeling paint, or a musty smell indoors.
Timing matters. If possible, inspect during daylight after rain has stopped or soon after snow begins to melt. Fresh moisture is easier to locate than an old, dried stain. During a cold Hudson Valley winter, frost on the underside of the roof decking can also reveal an insulation or ventilation problem that may turn into dripping water when temperatures rise.
Do not wait for a visible ceiling leak if your roof is older, shingles are missing, gutters are overflowing, or your attic has been unusually humid. Water often travels along framing and roof decking before it reaches the room below.
How to Inspect Attic for Roof Moisture
Start with safety. Wear a headlamp or bring a strong flashlight, use gloves, and wear a dust mask if the attic is dusty or poorly ventilated. Walk only on joists or installed flooring. Stepping between framing members can send a foot through the ceiling below and cause an unnecessary repair.
Take your time as you move through the attic. You are looking for patterns, not just an obvious puddle. Begin near the attic access point, then inspect the roof decking, rafters or trusses, insulation, plumbing vents, bathroom exhaust ducts, and the area around chimneys or skylights.
Look at the underside of the roof decking
The roof decking is the wood surface directly beneath your shingles. Use your flashlight to scan for darkened wood, irregular stains, water tracks, swollen areas, or soft-looking sections. A single old stain may be leftover evidence from a repair completed years ago. A stain that feels damp, has a dark edge, or appears larger than before deserves attention.
Look closely around roof penetrations. Plumbing vent boots, chimney flashing, skylights, attic fans, and satellite mounts are common leak points because they interrupt the roof surface. Water can enter at flashing and run several feet before appearing inside the attic, so the wet spot is not always directly below the actual roof opening.
If daylight is visible through the roof deck, call for professional service promptly. Even a small opening can allow wind-driven rain, insects, and winter moisture into the attic.
Check insulation for dampness and changes in texture
Insulation should look dry and reasonably even. Wet fiberglass may appear flattened, darker, or clumped together. Loose-fill insulation can become crusty or matted. Damp insulation loses insulating value, which can raise heating costs and leave the home more vulnerable to condensation.
Avoid pressing deeply into insulation, especially if you are unsure where the ceiling joists are located. Instead, inspect the surface around stained decking, vents, and exterior walls. If you find damp insulation, do not assume the roof is the only cause. Condensation, a disconnected bathroom fan duct, or a plumbing leak can create the same symptom.
Notice odors, mold-like growth, and rusty fasteners
A musty attic odor should never be ignored. It may indicate long-term moisture even when no active dripping is visible. Look for black, green, gray, or white spotting on sheathing and framing. Discoloration can have several causes, but visible growth combined with moisture calls for a prompt evaluation.
Rust is another useful clue. Rusty roofing nails protruding through the roof deck, corroded metal connectors, or rust on attic equipment can point to excessive humidity. This is especially common in attics with inadequate ventilation or bathroom exhaust fans that discharge into the attic instead of outdoors.
Roof Leak or Condensation? The Difference Matters
A true roof leak often follows weather. You may see wet decking or drips after rain, around a flashing detail, chimney, valley, or damaged shingle area. The pattern may be concentrated in one location.
Condensation tends to be more widespread. During very cold weather, warm humid air from the house can rise into the attic and meet the cold roof deck. That moisture may form frost or droplets across a broad section of sheathing. When temperatures warm, the frost melts and can mimic a roof leak.
The repair approach is different. A roof leak may require shingle replacement, flashing repair, or a targeted roof repair. Condensation may require air sealing around attic openings, correcting a vented bathroom fan, adding insulation, or improving intake and exhaust ventilation. Guessing can lead to money spent on the wrong solution.
Areas Homeowners Commonly Miss
Some of the most damaging moisture problems begin in places that are easy to overlook. Check the attic hatch or pull-down stairs for gaps and missing weatherstripping. Warm air leaking through that opening can feed condensation throughout the attic.
Inspect bathroom and kitchen exhaust ducts. They should be insulated where appropriate, securely connected, and vented all the way outdoors. A duct that ends in the attic sends warm, humid air directly into an enclosed space where moisture can collect on roof decking.
Also look near chimneys. The framing around a chimney can show staining from flashing failure, but it may also show moisture caused by an unlined or poorly venting chimney. Never touch hot vent pipes or disturb chimney components during your inspection.
Finally, check for blocked soffit vents. If insulation is packed tightly against the eaves, it can prevent outside air from entering the attic. Proper airflow is not a cure for every moisture issue, but it is a key part of keeping the roof deck dry and helping the attic regulate temperature.
What to Do When You Find Moisture
Take clear photos before moving or drying anything. Photograph the affected decking, nearby roof penetrations, wet insulation, and the general area so a roofing professional can understand the pattern. Note whether the moisture appeared after rain, snow, wind, or a sudden temperature change.
If water is actively dripping, place a container below it if you can do so safely, protect belongings below the attic, and arrange an emergency roof inspection. Do not climb onto a wet or snow-covered roof to investigate. The risk of a fall is not worth it, and roof damage is often difficult to diagnose from the surface without the right experience.
For minor stains with no active dampness, schedule an inspection rather than simply painting over interior evidence. A qualified contractor can assess the roofing, flashing, ventilation, and attic conditions together. That full picture is especially valuable for homes dealing with ice dams, aging shingles, or repeated winter moisture.
CPG Roofing & Siding helps homeowners identify whether attic moisture is coming from a roof defect, storm damage, or a ventilation-related issue. A professional inspection provides clear findings and practical repair options, so you can make a decision based on the condition of your home rather than a guess.
Your attic should be dry, well-ventilated, and uneventful. If you see damp wood, wet insulation, frost, or a new musty odor, act while the evidence is still visible. Early attention can be the difference between a focused repair and extensive damage to your roof structure and interior.