
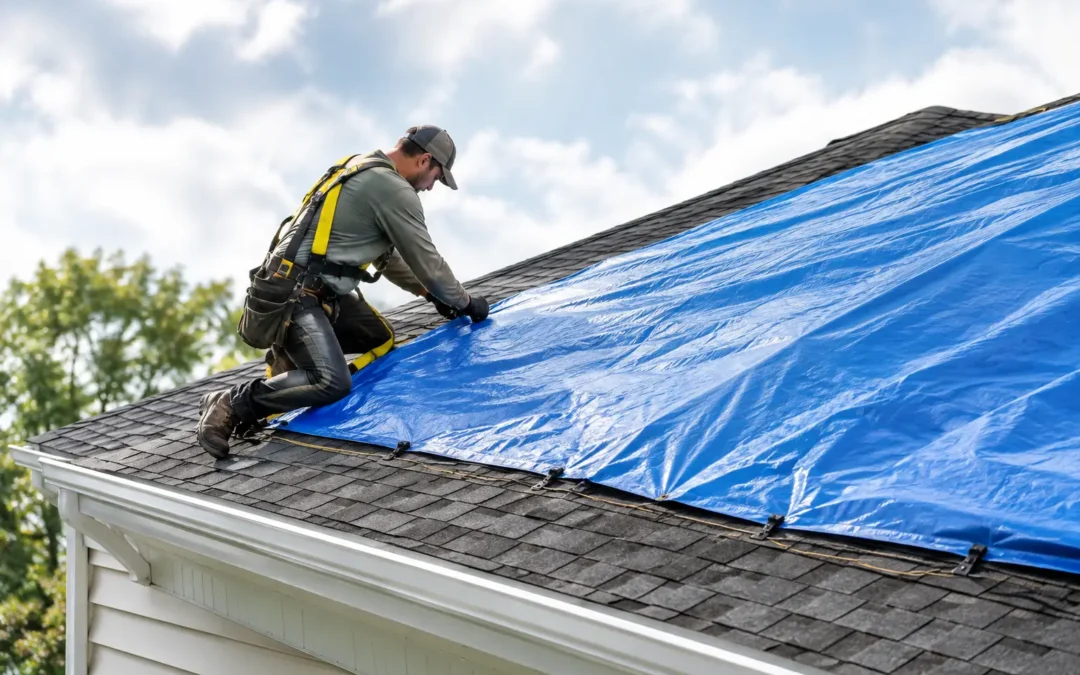
A missing shingle can become a ceiling stain overnight. A fallen branch can turn into soaked insulation, damaged drywall, and mold if rain reaches the opening. Knowing how to handle roof tarping gives you a temporary layer of protection while a qualified roofer evaluates the damage and plans the permanent repair.
Roof tarping is not a repair. It is an emergency measure designed to keep water out for a short period. Done correctly, it can limit further damage to your home or business. Done carelessly, especially on a wet, steep, icy, or wind-damaged roof, it can put someone at serious risk and may create more roofing damage.
Start With Safety, Not the Tarp
After a storm, resist the urge to climb onto the roof right away. High winds, lightning, wet shingles, snow, ice, and hidden structural damage make emergency roof work dangerous. If the roof deck feels soft, a tree has struck the building, electrical lines are nearby, or water is entering rapidly, stay off the roof and call for emergency professional help.
From the ground, look for visible signs such as missing shingles, lifted flashing, punctures, exposed roof decking, damaged ridge caps, or branches resting on the roof. Indoors, place buckets under active leaks and move furniture, electronics, rugs, and valuables away from the affected area. If water is near light fixtures or outlets, turn off power to that area only if it is safe to do so.
For many property owners, the safest decision is to have a roofing crew install the tarp. Professionals have the fall-protection equipment, ladders, materials, and experience to secure a tarp without turning temporary protection into another problem.
How to Handle Roof Tarping the Right Way
The goal is simple: cover the damaged area and direct water down the roof, not under the temporary cover. That requires a tarp large enough to extend beyond the opening on every side, including above the damaged area. Water runs downhill, so the upper edge of the tarp needs to reach well above the damage whenever possible.
Choose a heavy-duty polyethylene tarp rather than a thin utility tarp. A tarp that is too small, torn, or loosely placed will flap in Hudson Valley winds and can allow rain to drive underneath it. Measure from the ground if you can, then select a tarp with enough extra material to overlap the damage generously.
If conditions are safe and the roof has a low slope, begin by clearing loose debris around the damaged section. Do not pull on broken shingles, bent metal, or damaged flashing. Those materials may be holding more of the roof together than they appear to be.
Lay the tarp flat over the damaged area, keeping it smooth enough that rain cannot pool in folds. Position it so the tarp extends over the ridge if the damage is close to the peak. Covering the ridge helps prevent water from running beneath the top edge. On a larger exposed area, one tarp may not be enough. Overlap multiple tarps from top to bottom, like shingles, so water flows over the overlap instead of into it.
The safest fastening method depends on the roof type and damage. In many cases, roofing professionals secure tarp edges with wood battens or boards, then fasten those boards to sound decking. This spreads pressure along the tarp and reduces tearing in wind. Avoid driving unnecessary nails directly through an undamaged roof surface. Every extra penetration is a possible leak point once the tarp comes off.
Never rely on bricks, loose lumber, or heavy objects placed on top of a tarp. They can slide, damage shingles, or become dangerous in high winds. Rope can help in limited situations, but tying a tarp to gutters, downspouts, or nearby trees is rarely a dependable long-term solution.
When a Ground-Level Tarp Is the Better Choice
Not every temporary measure requires walking on a roof. If a window, siding area, or low eave has been damaged, you may be able to fasten a tarp from the ground or cover exposed belongings inside until help arrives. For a leak caused by ice dams, the visible water inside may not line up with the source on the roof. Walking on an icy roof is not worth the risk. Call an experienced roofer who can identify the cause safely.
Protect the Interior While the Roof Is Covered
A tarp limits new water intrusion, but it does not remove water that has already entered the structure. Check the attic or upper level carefully from a safe location. Look for wet insulation, darkened rafters, dripping sheathing, and water staining around vents or chimneys.
Use fans and dehumidifiers where appropriate, and remove saturated materials if they can be safely accessed. Wet insulation often loses its effectiveness and may need replacement. If a ceiling is bulging with water, do not stand directly beneath it or attempt a repair without assessing the risk. A water-heavy ceiling can collapse unexpectedly.
Commercial property owners should also protect inventory, equipment, records, and customer areas. Move items away from the leak, set up a controlled catch area, and document any interruption to operations. Quick action can make a meaningful difference when filing an insurance claim.
Document Damage Before and After Tarping
Take clear photos and videos from the ground before anything is moved, if conditions allow. Capture wide shots of the building, close-ups of visible damage, interior leaks, wet ceilings, damaged personal property, and any branches or storm debris involved. Continue documenting after the tarp is installed.
Contact your insurance carrier promptly and ask what information they need. Emergency mitigation is generally intended to prevent additional damage, but every policy and claim is different. Keep receipts for tarps, emergency service, cleanup supplies, temporary lodging, and other storm-related expenses.
Do not throw away damaged materials until your insurer or roofing professional advises you to do so. Missing shingles, broken flashing, and storm debris can help establish the cause and scope of loss. A detailed roof inspection also helps distinguish new storm damage from pre-existing wear.
Know What a Tarp Can and Cannot Do
A properly installed tarp can buy time, but it cannot restore the roof system underneath. It will not replace missing underlayment, repair compromised decking, correct ventilation issues, or stop a leak caused by failing flashing elsewhere on the roof. Strong wind can also loosen a tarp, especially when it remains in place for weeks.
That is why a roof tarp should be followed by a professional inspection as soon as conditions permit. The inspection should include shingles or roofing membrane, flashing, penetrations, gutters, roof decking, attic conditions, and nearby siding that may have been affected by wind-driven rain.
The final repair may be modest, such as replacing a few shingles and resealing flashing. In other cases, widespread wind damage, aging materials, or hidden deck deterioration may make a larger repair or replacement the more reliable choice. An honest contractor should explain the condition of the roof clearly, show you what they found, and outline the practical options without pressure.
When to Call for Emergency Roof Tarping
Call a roofing professional right away if you have an active interior leak, visible hole, missing section of roofing, tree impact, storm debris penetration, or damage after high winds. The same applies if you cannot safely access the roof, the roof is steep, or rain or snow is expected before repairs can be made.
For homeowners and property managers in Orange, Dutchess, Ulster, and Sullivan counties, changing weather can turn a manageable roofing issue into a larger water-loss event quickly. CPG Roofing & Siding provides emergency response focused on securing the property first, then identifying the repair needed for lasting protection.
A roof tarp is most effective when it is installed quickly, secured correctly, and followed by a clear repair plan. Protect the people inside first, document what happened, and let trained roofers handle the work that requires being off the ground. The right temporary response can give your property the time it needs to stay dry while a permanent solution is put in place.